

If you ship with Bosta, you can connect it to your StorkPlus store in a few minutes. After that, every new order goes to Bosta on its own, and the tracking number and delivery status come back to the order. It works for orders from your storefront and from WhatsApp, Messenger and Instagram.
- You need a Bosta API key with Read/Write access.
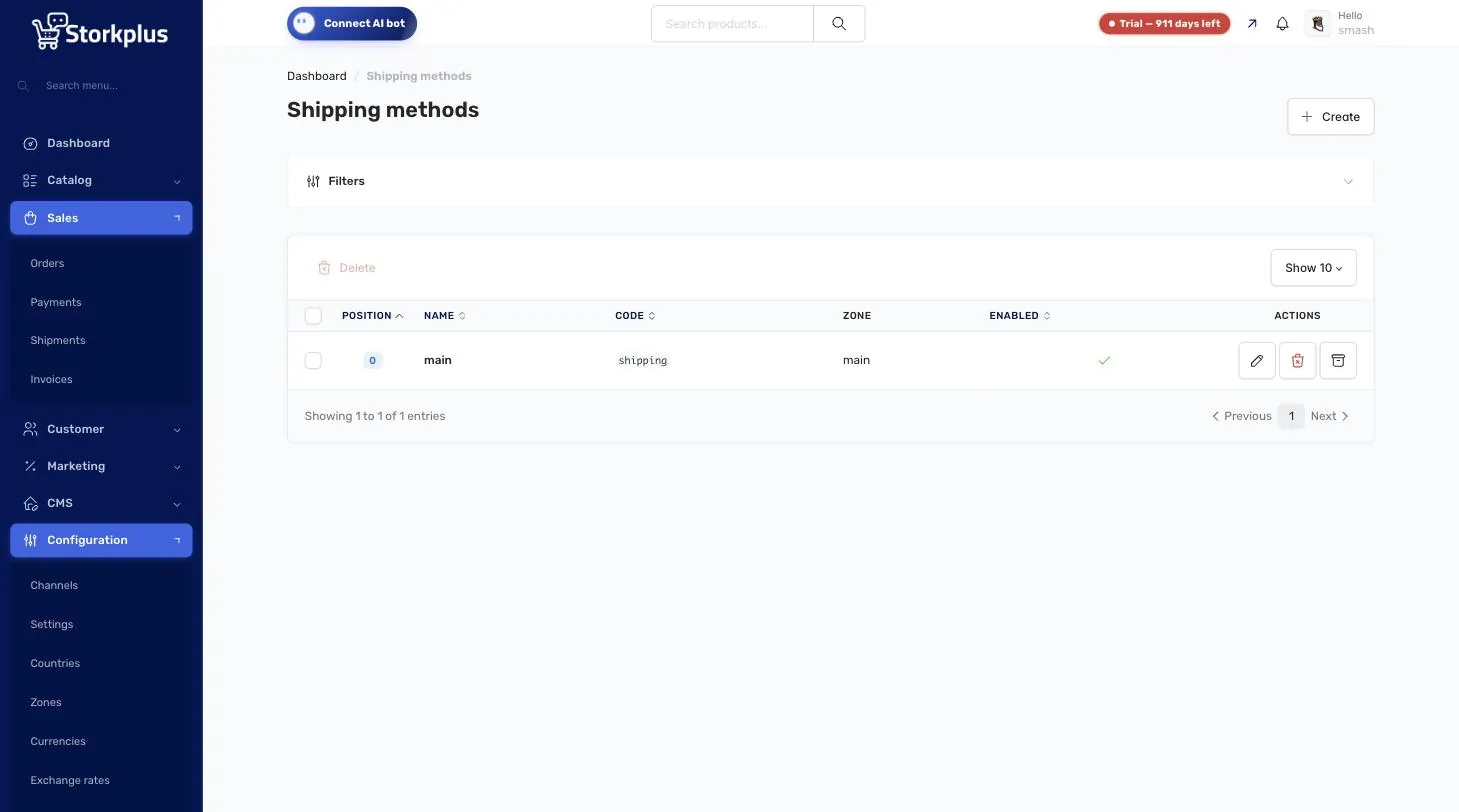
- Setup lives in Configuration → Shipping methods → Create → Bosta.
- Pick the pickup city, package size and how the shipping fee is calculated.
- The webhook URL is fixed for your store and updates delivery status automatically.
- Bosta shipping is available on every plan, including the free starter plan.
Before you connect Bosta shipping
- An active Bosta account.
- An API key: in the Bosta dashboard open Settings → API Integration and create a key with Read/Write access.
- A StorkPlus store (the free plan is enough).
Step 1: Add a Bosta shipping method
In your store admin open Configuration → Shipping methods, click Create and choose Bosta as the calculator. Name the method in Arabic and English and pick the zone you ship to.
Step 2: Paste your API key
Paste the key into Bosta API key. This lets the store create deliveries in your Bosta account.
Step 3: Webhook URL and secret
- Bosta webhook URL is fixed for your store. The store sends it to Bosta with every delivery, so updates arrive on their own.
- To also receive updates for deliveries you edit in the Bosta dashboard, add the same URL in Bosta under Settings → API Integration → Webhook.
- Webhook secret is generated for you. Bosta sends it with every update so your store can trust it.
Step 4: Pickup city, location and package size
- Pickup city: where Bosta collects your parcels.
- Pickup location ID (optional): only if you have several pickup locations in Bosta. Leave it empty to use your default.
- Package size: small, medium, large, light bulky or heavy bulky.
Step 5: The shipping fee your customer pays
Shipping fee has two modes: a flat amount per sales channel, or the Bosta fee estimate for the customer city. The flat amount is always the fallback when the Bosta estimate is unavailable.
Step 6: Cash on delivery and automatic deliveries
- Select your cash on delivery payment methods. Those orders go to Bosta with the order total to collect.
- Turn on Create the Bosta delivery automatically: it is created when a COD order is placed, or once an online payment is paid.
- Turn on Mark cash-on-delivery payments as paid when Bosta delivers, so the order closes itself.
Every order page shows the tracking number and Bosta status, and lets you retry or recreate a delivery.
Common Bosta setup mistakes
- A read-only key: it must be Read/Write, or deliveries are not created.
- Forgetting the COD payment methods: if none are selected, deliveries go out without an amount to collect.
- A flat amount of zero: when the Bosta estimate is unavailable the flat amount is what the customer sees, so set a real number.
- Several stores on one Bosta account: set a different order reference prefix per store so orders do not get mixed up.
Frequently asked questions
Is the Bosta integration available on the free plan?
Yes. Shipping methods, including Bosta, are available on every StorkPlus plan, and the starter plan is free.
Do I have to copy order details to Bosta by hand?
No. With automatic creation on, the delivery is created for you and the tracking number and status come back to the order.
What happens if the Bosta fee estimate is unavailable?
The store uses the flat amount you set per sales channel as a fallback, so the customer can still finish checkout.
Read next
- Protect your store from fake orders with Bosta and cash on delivery
- How to choose an e-commerce platform that stops fake orders
- Open your online store in 15 minutes
Try it yourself: open your free StorkPlus store — the starter plan is free, with 0% commission on sales.